Best Welding Helmets: Auto-Darkening, Lens Shade and Fit
Miller notes typical weld shades fall between #8 and #13, and auto-darkening helmets use from two sensors for hobby helmets to four for industrial grade. Passive fixed-shade helmets, typically #10, are generally lightweight. Choose a shade at or above the minimum for your process and amperage, and always wear safety glasses under the helmet, as Miller advises.
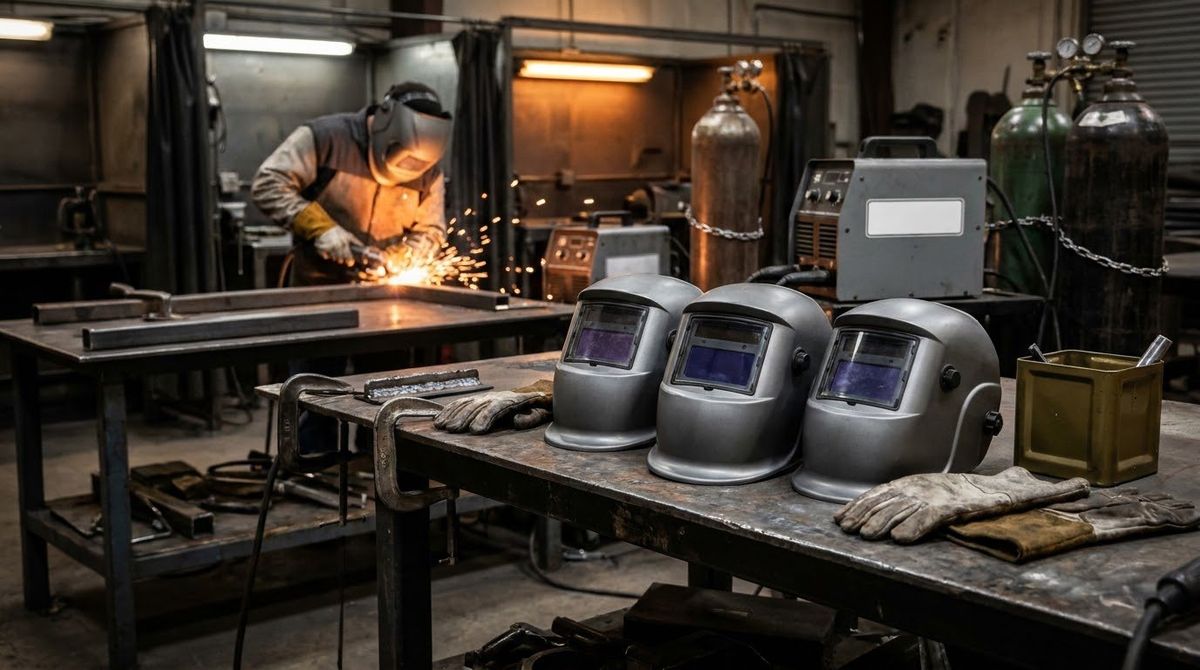
From the guide: Welding Safety and PPE: Fumes, Arc Flash, Shock, Fire and Gas Cylinders
Safety notice: This guide provides educational information based on ANSI Z49.1, ANSI Z87.1, OSHA 29 CFR 1910.252, and manufacturer documentation. It is not a substitute for your helmet’s owner’s manual, workplace safety rules, or instruction from a qualified welding instructor.
Choosing the right welding helmet starts with matching its lens shade range, sensor count, and safety certification to the welding processes you run most often. As part of a complete personal protective equipment setup—covered in full in our welding safety and PPE guide—your helmet is the primary barrier protecting your eyes and face from ultraviolet (UV) radiation, infrared (IR) heat, and flying spatter.
Whether you are buying your first hood for a garage wire-feed welder or upgrading for all-day TIG fabrication, understanding how standards, lens electronics, and headgear work together prevents eye strain and arc flash. This guide breaks down the specifications that actually matter without brand hype.
Auto-Darkening vs. Passive Welding Helmets
An auto-darkening welding helmet switches from a light state to a dark welding shade when its sensors detect an arc (Miller’s helmets have a light state of 2.5 or 3, depending on the model), while a passive helmet holds a fixed-shade filter, typically #10, that stays dark at all times.
Passive helmets are generally lightweight, per Miller, and have no batteries or electronics. The trade-off is workflow: with a fixed dark lens, you must position the torch or electrode, nod the hood down, and strike the arc without seeing the joint.
Auto-darkening helmets let you see the joint in the light state, place your TIG tungsten or MIG wire, and start the weld without lifting and lowering the hood. Because they depend on power, check battery charge before welding, as Miller advises.
Required Safety Standards: ANSI Z87.1 and 29 CFR 1910.252
OSHA 29 CFR 1910.133 requires eye and face protection to meet ANSI Z87.1, and 1910.252 requires helmet shells to insulate against heat and electricity.
OSHA’s general welding standard (29 CFR 1910.252) requires helmets or hand shields during all arc welding or cutting except submerged arc welding. Under (b)(2)(ii)(A), they must be made of a material that is an insulator for heat and electricity and not readily flammable, and helmets must have filter plates and cover plates designed for easy removal.
OSHA’s eye and face protection rule, 29 CFR 1910.133, lists ANSI/ISEA Z87.1 as the consensus standard that protectors must meet. Check for the Z87.1 marking on the helmet or lens and keep the manufacturer’s instructions with it. Miller says its auto-darkening lens provides UV and IR protection even if it does not darken as expected, but you should still check battery charge before welding.
A welding helmet alone is not protection when the hood is raised. Miller advises: “Always wear your safety glasses under the welding helmet.”
Welding Helmet Lens Shade Chart by Process and Amperage
Selecting the right lens shade depends on your welding process and arc amperage. Miller notes typical weld shades fall between #8 and #13.
The shade guide below comes from ANSI Z49.1:2012 (Safety in Welding, Cutting, and Allied Processes), reproduced from AWS F2.2, and lists minimum protective shades alongside suggested comfort shades. The guide is for guidance and may be varied to suit individual needs. As a rule of thumb, start with a shade too dark to see the weld zone, then go to a lighter shade that gives sufficient view without going below the minimum. OSHA’s own table in 1910.252(b)(2)(ii)(H) is organized by electrode size and gives, for example, Shade 10 for 1/16 to 5/32-inch shielded metal arc electrodes.
| Process | Amperage Range | Minimum Shade (ANSI Z49.1) | Suggested Comfort Shade |
|---|---|---|---|
| SMAW (Stick) | Under 60 A | 7 | — |
| SMAW (Stick) | 60 – 160 A | 8 | 10 |
| SMAW (Stick) | 160 – 250 A | 10 | 12 |
| SMAW (Stick) | 250 – 550 A | 11 | 14 |
| GMAW (MIG) & FCAW | Under 60 A | 7 | — |
| GMAW (MIG) & FCAW | 60 – 160 A | 10 | 11 |
| GMAW (MIG) & FCAW | 160 – 250 A | 10 | 12 |
| GMAW (MIG) & FCAW | 250 – 500 A | 10 | 14 |
| GTAW (TIG) | Under 50 A | 8 | 10 |
| GTAW (TIG) | 50 – 150 A | 8 | 12 |
| GTAW (TIG) | 150 – 500 A | 10 | 14 |
| Oxyfuel welding | Light (under 1/8”) to heavy (over 1/2”) | 4 or 5 to 6 or 8 | — |
If you run multiple processes, look for a variable-shade helmet that covers the shades your processes require, and check each helmet’s published shade range. You can explore how each process differs in our types of welding processes guide and check recommended amperage ranges with our welding tools and calculators.
Key Specs That Separate Entry Hoods from Pro Helmets
Beyond the shade range, a few specifications set helmets apart: arc sensor count, sensitivity and delay controls, optical clarity, and grind mode.
Arc Sensors
Miller says the number of sensors ranges from two for a hobby-level helmet to four for an industrial-grade helmet. When a pipe, clamp, or your filler hand blocks one sensor’s view of the arc, additional sensors give the lens more chances to see it. Check the manufacturer’s guidance for low-amperage TIG.
Sensitivity and Delay Controls
Many helmets offer sensitivity and delay controls. Sensitivity adjusts how easily the sensors trigger, which matters for low-amp arcs and bright surroundings. Delay sets how long the lens stays dark after the arc stops. Set both per the owner’s manual.
Optical Clarity
Manufacturers list an optical class made of four numbers on a scale where 1 is best. ESAB, for example, describes 1/1/1/1 as the highest optical performance possible. Clarity is separate from shade: shade determines how much radiation is blocked, so never choose a lighter shade for better visibility than your process allows.
Grind Mode and Cover Lenses
Some helmets have weld, cut, and grind modes (Miller lists them on its Classic Series). Switch back to weld mode before striking an arc, and keep the filter and cover plates installed and in good condition per the manual. OSHA requires helmets to have filter plates and cover plates designed for easy removal.
Helmet Fit, Weight, and Headgear Comfort
Even the best lens becomes a liability if neck fatigue or poor headgear fit makes you lift the hood unnecessarily.
Look for adjustable headgear that spreads weight comfortably and leaves room for the safety glasses you must wear under the helmet. If you wear a respirator, check that the helmet leaves enough clearance, and note that some welders use a powered air-purifying respirator (PAPR) system, which we cover in our welding fume safety and ventilation guide.
For overhead or tight-space welding, shell shape and weight matter. Pairing a well-fitted helmet with flame-resistant clothing and a cap protects against falling spatter, and remember to keep your work area clear of combustibles per our welding fire safety and hot work guide.
Protecting Helpers, Bystanders, and Arc-Flash Exposure
A helmet only protects the person wearing it. Under OSHA 29 CFR 1910.252(b)(2), helmets or hand shields are required during all arc welding or arc cutting except submerged arc welding, and helpers and attendants need proper eye protection too. The same section says workers or other persons adjacent to the welding area shall be protected from the arc rays, and it allows welding in an enclosed booth with a low-reflectivity finish. Practically, that means welding screens or curtains in shared spaces and telling anyone nearby to look away from the arc or wear suitable eye protection.
OSHA’s shade table in 1910.252(b)(2)(ii)(H) is arranged by electrode size, with examples including Shade 10 for shielded metal arc electrodes from 1/16 to 5/32 inch and Shade 14 for electrodes from 5/16 to 3/8 inch. The standard describes these recommendations as a guide that may be varied to suit the individual’s needs. If you are unsure which shade to use, check the ANSI Z49.1 guide above and your helmet’s manual, and start darker rather than lighter.
Finally, build habits around the equipment. Check battery charge before welding, wear safety glasses under the helmet, keep filter and cover plates clean and in place, and replace a helmet whose lens does not darken. These small checks cost seconds and protect your eyes from arc flash.
Which Welding Helmet Should You Choose?
Match your helmet choice to your primary welding process and shop environment:
- Hobbyists and home-shop work: Miller describes two sensors as hobby level. Pick a helmet whose shade range covers your processes and that carries the Z87.1 marking.
- TIG and multi-process fabricators: Consider four sensors, which Miller describes as industrial grade, and compare optical class and shade range on the spec sheet.
- Minimalists: A passive fixed-shade helmet, typically #10 per Miller, is generally lightweight and has no batteries, but you cannot see the joint before striking the arc.
Whichever you choose, wear safety glasses underneath, as Miller advises.
| Attribute | Passive Fixed-Shade Helmet | Entry Auto-Darkening (2-Sensor) | Pro Auto-Darkening (4-Sensor) |
|---|---|---|---|
| Lens Shade | Fixed (commonly Shade 10) | Variable (Miller: typical weld shades #8 to #13) | Variable; check the manufacturer spec |
| Light State | None (dark at all times) | Light state per spec (Miller: 2.5 or 3) | Light state per spec |
| Arc Sensors | 0 (passive glass/poly) | 2 sensors (hobby level, per Miller) | 4 sensors (industrial grade, per Miller) |
| Power Source | None required | Check the spec (solar, battery, or both) | Check the spec |
| Grind Mode | Not applicable; lift the hood and wear safety glasses | Weld, cut, and grind modes on some models | Check the spec |
| Best For | Single-process stick/MIG on a budget | Home shop MIG, flux-core, and stick | Low-amp TIG, out-of-position, all-day fabrication |
Consider a 2-sensor auto-darkening helmet for hobby work, a 4-sensor model for industrial-grade or out-of-position work, and a passive Shade 10 helmet if you want minimal weight and no electronics. In every case, choose a shade at or above the minimum for your process and amperage.
Questions we get
Do auto-darkening welding helmets protect your eyes if the battery dies?
Miller says its auto-darkening lens provides UV and IR protection even if it does not darken as expected, but it does not claim the lens is safe to weld with if it fails to darken. Check battery charge before welding, and stop and replace or repair a helmet whose lens does not darken.
What shade welding helmet do I need for MIG, TIG, and stick welding?
It depends on process and amperage. ANSI Z49.1:2012 lists minimum shades such as 8 for stick at 60 to 160 amps, 10 for MIG and flux-core at 60 to 250 amps, and 8 for TIG below 150 amps, with suggested comfort shades from 10 to 14. Start with a shade too dark to see the weld zone, then go lighter without going below the minimum.
Should I still wear safety glasses under a welding helmet?
Yes. Miller advises always wearing safety glasses under the welding helmet. OSHA 29 CFR 1910.133 requires eye protection meeting ANSI Z87.1 when workers face hazards such as flying particles or molten metal, and chipping slag or grinding with the hood up exposes you to both.
How many arc sensors does an auto-darkening welding helmet need?
Miller says the number of sensors ranges from two for a hobby-level helmet to four for an industrial-grade helmet. More sensors give the lens more chances to see the arc when something blocks one sensor, which matters when you weld in tight spaces or at low amperage.
What is the difference between passive and auto-darkening welding helmets?
A passive helmet has a fixed shade, typically #10, and is generally lightweight, but you cannot see the joint through it before striking an arc. An auto-darkening helmet has a light state (Miller's are 2.5 or 3 depending on the model) for setup and darkens to your selected shade when its sensors detect an arc.
What does 1/1/1/1 optical clarity mean on a welding helmet?
Manufacturers list an optical class made of four numbers, scored from 1 (best) to 3. ESAB, for example, describes 1/1/1/1 as the highest optical performance possible. Compare spec sheets, because clarity is separate from the shade rating, which determines how much protection you get.
Where we got this
- Miller Electric — Selecting the Right Welding Helmet for You (millerwelds.com)
- ANSI Z49.1:2012 Guide for Shade Numbers (reproduced from AWS F2.2), Bechtel/DOE UPF-CP-205 (y12.doe.gov)
- OSHA — 29 CFR 1910.133 Eye and Face Protection (osha.gov)
- Shop Metalworking Technology — ESAB High Definition Welding Helmet (optical class 1/1/1/1) (shopmetaltech.com)
- eCFR — 29 CFR 1910.252 Welding, Cutting, and Brazing General Requirements (ecfr.gov)
Keep reading
- Welding Safety and PPE: Fumes, Arc Flash, Shock, Fire and Gas Cylinders
Welding safety and PPE guide covering OSHA 1910.252, ANSI Z49.1, fume ventilation, arc-eye protection, electric shock, fire watch, and gas cylinders.
- Welding Fire Safety and Hot Work Precautions
Follow OSHA 1910.252 and NFPA 51B hot work rules, the 35-foot combustible clearance rule, fire watch duties, and shop fire extinguisher selection.
- Welding Fume Safety and Ventilation: What OSHA and NIOSH Say
Learn OSHA 1910.252 ventilation rules, NIOSH fume hazards like hexavalent chromium and manganese, and how to choose LEV, respirators, and PAPRs.