Stick Welding (SMAW) Guide: Rods, Amperage and Technique
Stick welding (Shielded Metal Arc Welding, or SMAW) uses a flux-coated consumable electrode and a constant-current power source, and needs no shielding gas cylinder. Miller says it suits dirty or rusted material and windy conditions. Match your rod classification, such as E6011, E6013, or E7018, to your machine's AC or DC polarity and the amperage range on the electrode box.
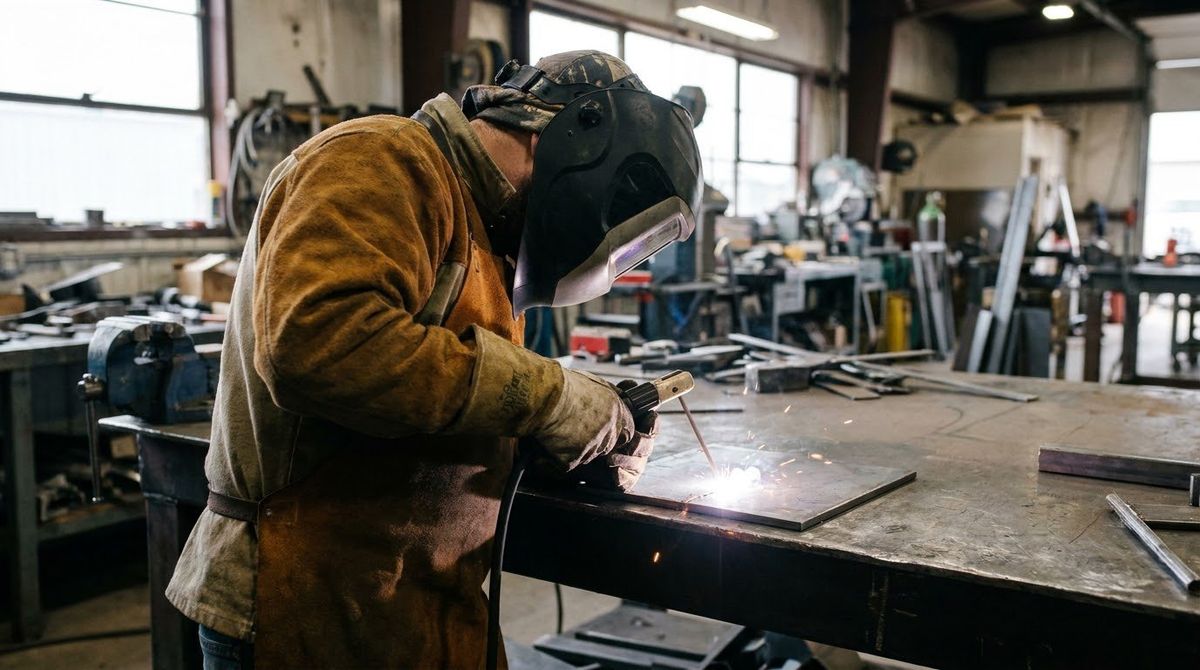
From the guide: Types of Welding Processes Explained: MIG, TIG, Stick, Flux-Core and More
Shielded Metal Arc Welding (SMAW)—commonly called stick welding—is the rugged workhorse of structural steel, farm repair, and outdoor construction, as outlined in our types of welding processes guide. Because the consumable electrode carries its own flux coating that generates shielding gas and protective slag as it burns, stick welding needs no external gas cylinder, and Miller says it is well suited to dirty or rusted material and windy conditions.
While MIG welding is more forgiving on thin metal, Miller notes stick can handle thicker material (with multiple passes and slag removal) and can easily burn through metal that is 18 gauge or thinner. This guide explains how to decode AWS electrode numbers, choose polarity and amperage, strike an arc cleanly, and work safely under OSHA rules.
How Stick Welding (SMAW) Works
A constant-current (CC) power source delivers current through an electrode holder (“stinger”) clamped onto a flux-coated metal rod. When you strike the rod against the grounded workpiece, an intense electric arc melts both the steel core wire and the surrounding flux coating.
To see published current ranges for the rod you plan to run, the amperage and settings calculator lists them by electrode and diameter.
The vaporizing flux forms a gas shield around the arc, while heavier flux ingredients float to the top of the molten puddle and solidify into slag. Once the weld cools, you chip and wire-brush the slag away to reveal the finished bead.
Decoding AWS Stick Electrode Numbers
Every standard mild-steel stick electrode carries a 4-digit AWS classification such as E7018 or E6011:
- E: Arc welding electrode.
- First two digits (60 or 70): Tensile strength in thousands of psi (ksi), as Hobart’s classification chart shows (for example 70 ksi).
- Third digit (1, 2, or 4): Welding positions allowed (
1= all positions: flat, horizontal, vertical, overhead;2= flat and horizontal fillets only). - Fourth digit (0, 1, 3, 8): Flux coating type and the current it suits (AC, DCEN, or DCEP).
The Four Most Common Stick Rods
- E6010 (DCEP, DC only): Miller describes it as an all-position electrode with deep penetration and a tight arc, suitable only with DC power. Hobart lists its E6010 at 40–70 A (3/32”) and 65–130 A (1/8”) on DCEP.
- E6011 (AC or DCEP): Miller describes it as an all-position electrode for AC and DC that penetrates corroded or dirty metal. Hobart lists its E6011 at 60–90 A (3/32”) and 80–125 A (1/8”) on AC or DCEP.
- E6013 (AC or DC): Miller says it works best on newer, clean material with a soft arc, low spatter and easily removed slag. Hobart lists its E6013 at 40–80 A (3/32”) and 70–120 A (1/8”) on AC, DCEN or DCEP.
- E7018 (low hydrogen, AC or DCEP): Miller says it gives a smooth arc and strong impact properties, even in cold weather. It must be kept dry (see the storage guidance in the FAQ). Hobart lists its E7018 at 70–110 A (3/32”) and 90–165 A (1/8”) on DCEP or AC.
Note: These ranges are from one manufacturer’s catalog (Hobart Brothers). Always verify exact amperage and polarity on the electrode manufacturer’s box or data sheet, as products and brands vary. You can also check starting amperage ranges in our free welding tools.
Stick Welding Setup and Technique
1. Set Polarity and Starting Amperage
Check your rod box for DCEP (electrode positive), DCEN (electrode negative), or AC, and connect your stinger and ground clamp accordingly. Miller says the correct current depends primarily on electrode diameter and type, and suggests reducing heat by about 15 percent for vertical and overhead work compared with flat welding. Start within the rod’s published range.
2. Strike the Arc Without Sticking
Use one of two reliable arc-starting motions:
- Scratch start: Brush the rod tip lightly across the plate like striking a match, then lift it slightly as soon as the arc ignites to establish the arc length.
- Tap start: Tap the rod briskly straight down and immediately lift slightly. If the rod freezes to the plate, twist the wrist side-to-side to free it or release the electrode from the holder before the rod overheats.
3. Maintain Arc Length and Drag Angle
Miller says the arc should not be longer than the electrode’s metal core diameter: a short arc can make the electrode stick, while a long arc causes spatter, undercut and porosity. For flat, horizontal and overhead welding, hold the electrode perpendicular to the joint and tilt the top of the electrode in the direction of travel by approximately 5 to 15 degrees, a drag technique. For vertical-up, Miller says to use a push technique with the electrode tilted away from the direction of travel.
4. Feed the Rod Downward as It Burns
Unlike MIG wire, a stick rod gets shorter every second. Continuously feed your hand downward toward the joint at the exact rate the rod melts so your arc length stays constant from start to finish.
5. Watch for Arc Blow on DC Welds
When welding near the end of a heavy plate or inside tight corners on DC, magnetic fields can deflect the arc sideways (“arc blow”). Repositioning the work clamp, changing the welding direction, or shortening your arc length can help stabilize the arc, and switching to AC with an AC-rated electrode such as E6011 (Hobart lists it for AC or DCEP) removes the DC magnetic effect.
6. Multi-Pass Slag Cleaning and Out-of-Position Control
On thick structural joints that require multiple passes, chip every trace of slag with a chipping hammer and scrub the weld toes with a wire brush before starting the next bead. Leftover slag trapped under a fresh pass can create a defect. How the joint type and welding position change your rod angle and pass sequence is covered in welding joint types and positions. For vertical-up welding, Miller says to use a push technique and reduce heat for out-of-position work, and notes that material thicker than 1/4 inch benefits from side-to-side manipulation.
Troubleshooting Common Stick Welding Issues
- Slag inclusions: Poor technique, an overly long arc, or incomplete slag removal between passes can trap slag. Clean slag completely between multi-pass welds.
- Porosity in E7018 welds: Rods may have absorbed moisture (see storage guidance), or the arc was too long, which Miller says causes porosity.
- Undercut along bead edges: Miller says a long arc causes undercut; also check that amperage matches the electrode’s published range.
Stick Welding Safety Rules (YMYL)
SMAW carries elevated electrical, slag, and fume hazards governed by OSHA 29 CFR 1910.252 and ANSI Z49.1 (published by AWS)—review our welding safety and PPE guide before welding:
- Electric shock prevention: Stick electrode holders are electrically live whenever the machine is switched on. Never change electrodes with bare hands or wet gloves, never weld in rain or standing water, and inspect stinger insulation and ground clamps regularly.
- Slag chipping eye protection: Hot slag pops unpredictably as beads cool. Always wear safety glasses with side shields underneath your welding helmet, and keep your helmet or a clear face shield down while chipping slag.
- Fumes and ventilation: NIOSH notes that welding fumes are composed of metals and most contain some manganese, with exposure varying with the electrode and base metal, and that confined space welding can significantly increase exposure. OSHA 1910.252(c) requires special controls for zinc-bearing, lead-bearing and cadmium-coated metals. Use local exhaust or strong mechanical ventilation.
- Arc eye and fire: Wear a helmet with the filter lens shade that OSHA 1910.252(b)(2) specifies (shade 10 for SMAW with 1/16- to 5/32-inch electrodes), leather gloves, and flame-resistant clothing. Relocate combustibles at least 35 feet from the work site where practicable, keep a fire extinguisher on hand, and maintain a fire watch for at least a half hour afterward.
Disclaimer: Always consult your welder’s manual, electrode data sheets, and OSHA/ANSI Z49.1 safety rules.
Next Steps
Compare outdoor stick welding with gasless wire in our flux-core welding guide, check electrode storage tips in our welding supplies and consumables guide, or browse machine options in our choosing a stick-capable machine.
Questions we get
What is the easiest stick welding rod for beginners?
Miller describes E6013 as suitable with AC or DC power, with a soft arc, low spatter and easily removed slag, working best on newer and clean materials. E7018 gives a smooth arc and strong impact properties on AC and DC machines but needs dry storage. Choose the rod that matches your machine, metal condition and the electrode maker's data.
What is the difference between 6010, 6011, 6013, and 7018 rods?
Per Miller, 6010 is an all-position DC-only rod with deep penetration and a tight arc, and 6011 is an all-position AC or DC rod that penetrates corroded or dirty metal. 6013 has a soft arc, low spatter and easy slag removal on clean metal, and 7018 has a smooth arc and strong impact properties, even in cold weather.
Do you push or pull a stick welding electrode?
Miller says to hold the electrode perpendicular to the joint and tilt the top of the electrode in the direction of travel by approximately 5 to 15 degrees for flat, horizontal and overhead welding, which is a drag technique. For vertical-up welding, Miller says to use a push technique with the electrode tilted away from the direction of travel.
Why does my stick welding rod keep sticking to the metal?
Miller says a short arc can make the electrode stick, while a long arc causes spatter, undercut and porosity. It says the arc should not be longer than the electrode's metal core diameter. Check that your amperage matches the electrode diameter and type on the box, since Miller notes current depends primarily on those two factors, and keep the arc length steady.
How should I store 7018 stick welding rods?
Hobart's catalog recommends storing low-hydrogen 7018 electrodes from open cartons at 250 to 300 degrees F, and says only hermetically sealed cans are safe against humidity. Its reconditioning guidance for 7018 is 500 to 800 degrees F for 1 to 2 hours, while 6010 and 6011 should not be oven reconditioned. Always follow your electrode manufacturer's instructions.
Can you stick weld outside in the wind?
Miller says both flux-cored welding and stick are equally suited to welding on dirty or rusted material and in windy conditions. The electrode's flux coating provides the shielding gas, so stick does not need a gas cylinder. Follow the usual fire, ventilation and electrical safety precautions outdoors, including clearing combustibles from the work area.
Where we got this
- Miller Electric: Stick Welding for Equipment Repair — Electrodes, Equipment and Technique (millerwelds.com)
- Miller Electric: MIG and Flux-Cored Welding on the Farm (millerwelds.com)
- Miller Electric: Understanding Common Welding Terms — A Guide for Beginners (millerwelds.com)
- Hobart Brothers 2021 Filler Metals Catalog (stick electrode data and storage) (codinter.com)
- OSHA 29 CFR 1926.350 — Gas welding and cutting (cylinder handling) (osha.gov)
- OSHA 29 CFR 1910.252 — Welding, Cutting, and Brazing General Requirements (osha.gov)
- AWS Z49.1:2021 Safety in Welding, Cutting, and Allied Processes (pubs.aws.org)
- CDC / NIOSH Welding Fumes and Manganese (cdc.gov)
Keep reading
- Types of Welding Processes Explained: MIG, TIG, Stick, Flux-Core and More
Learn the 4 main types of welding—MIG, TIG, Stick, and Flux-Core—how each works, compatible metals, and how to pick the right process.
- Flux-Core Welding (FCAW) Guide: Self-Shielded vs Gas-Shielded
Learn flux-core welding (FCAW): self-shielded FCAW-S vs gas-shielded FCAW-G, DCEN vs DCEP polarity, knurled drive rolls, drag technique, and fume safety.
- MIG vs TIG Welding: Differences, Costs and When to Use Each
Compare MIG vs TIG welding on speed, weld appearance, skill level, gas requirements, and equipment cost to pick the right process for your project.
- MIG Welding for Beginners: Setup, Technique and Common Mistakes
Learn MIG welding (GMAW) step by step: wire sizes, C-25 gas flow rates, DCEP polarity, gun angle, travel speed, and how to fix common weld defects.
- TIG Welding Guide: How GTAW Works and How to Start
Learn TIG welding (GTAW) step by step: DCEN vs AC polarity, argon flow, tungsten prep, filler technique, and safety rules.
- Welding Joint Types and Positions: Butt, Tee, Lap, Corner, Edge and 1G-6G
Learn the 5 basic weld joint types and the flat, horizontal, vertical, and overhead positions, plus what the 1G-6G and 1F-4F position codes mean.